retia@badge26:~$ cat readme.md

ScriptKitty
DEF CON Badge

The badge with nine lives.
By Retia LLC in partnership with IoT Village for DEF CON.

This handsome radio cat is an ESP32-S3 with a color touchscreen, a 915 MHz LoRa radio, ten NeoPixels, and a piezo that plays sound effects.

It's built for DEF CON 2026 to make hacking the mesh easy for beginners, and to give everyone the agency to choose how they communicate in an uncertain future.

[ flash the badge ] Getting started
// flashing and the serial monitor run on any browser supporting Web Serial.
// made in the USA by real catboys and catgirls.
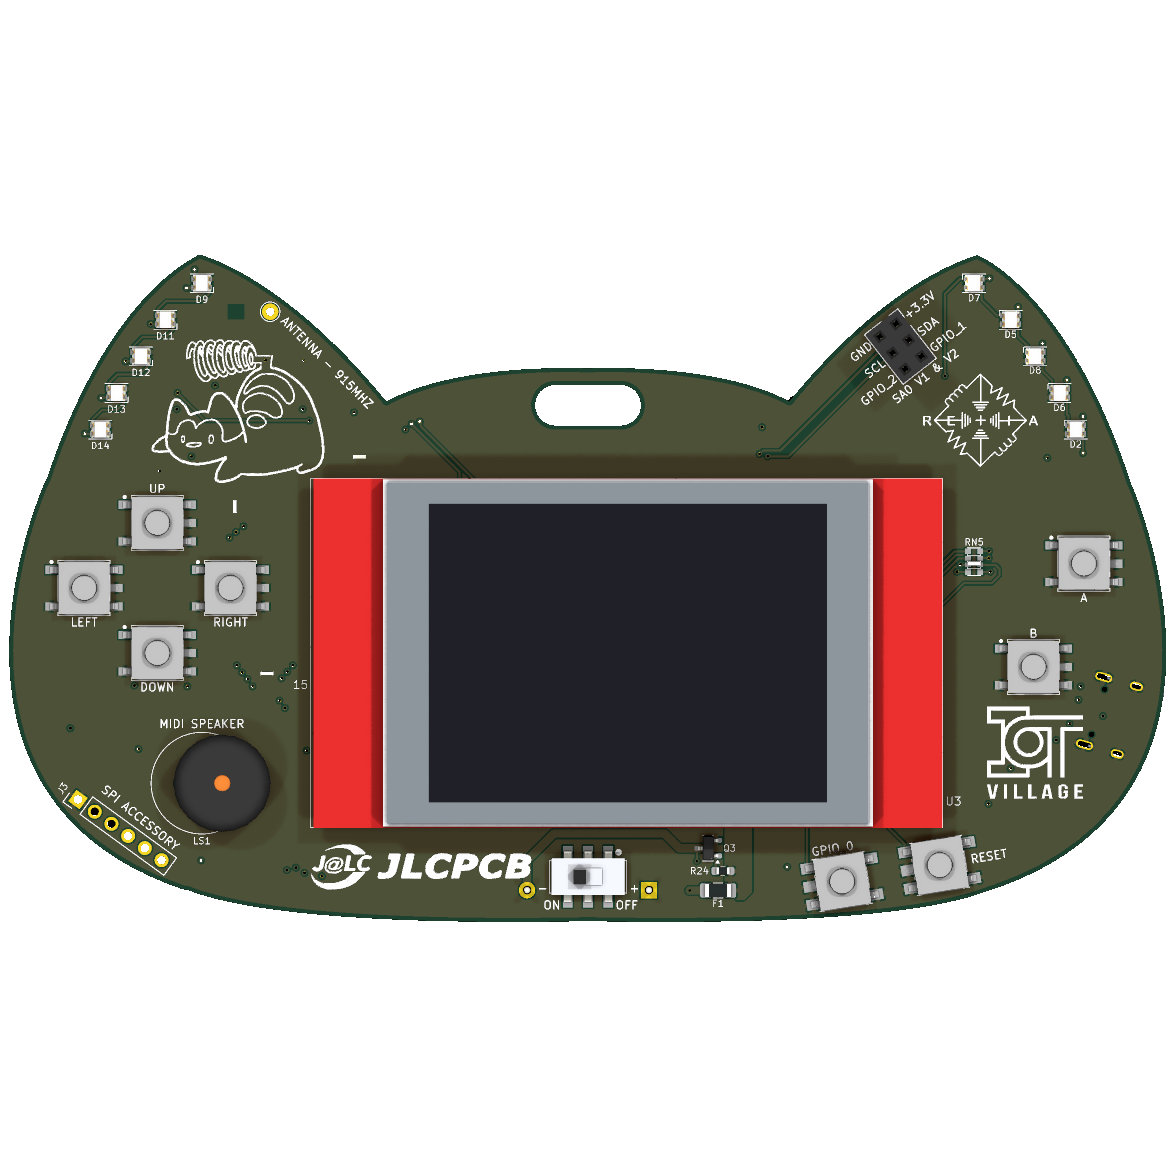
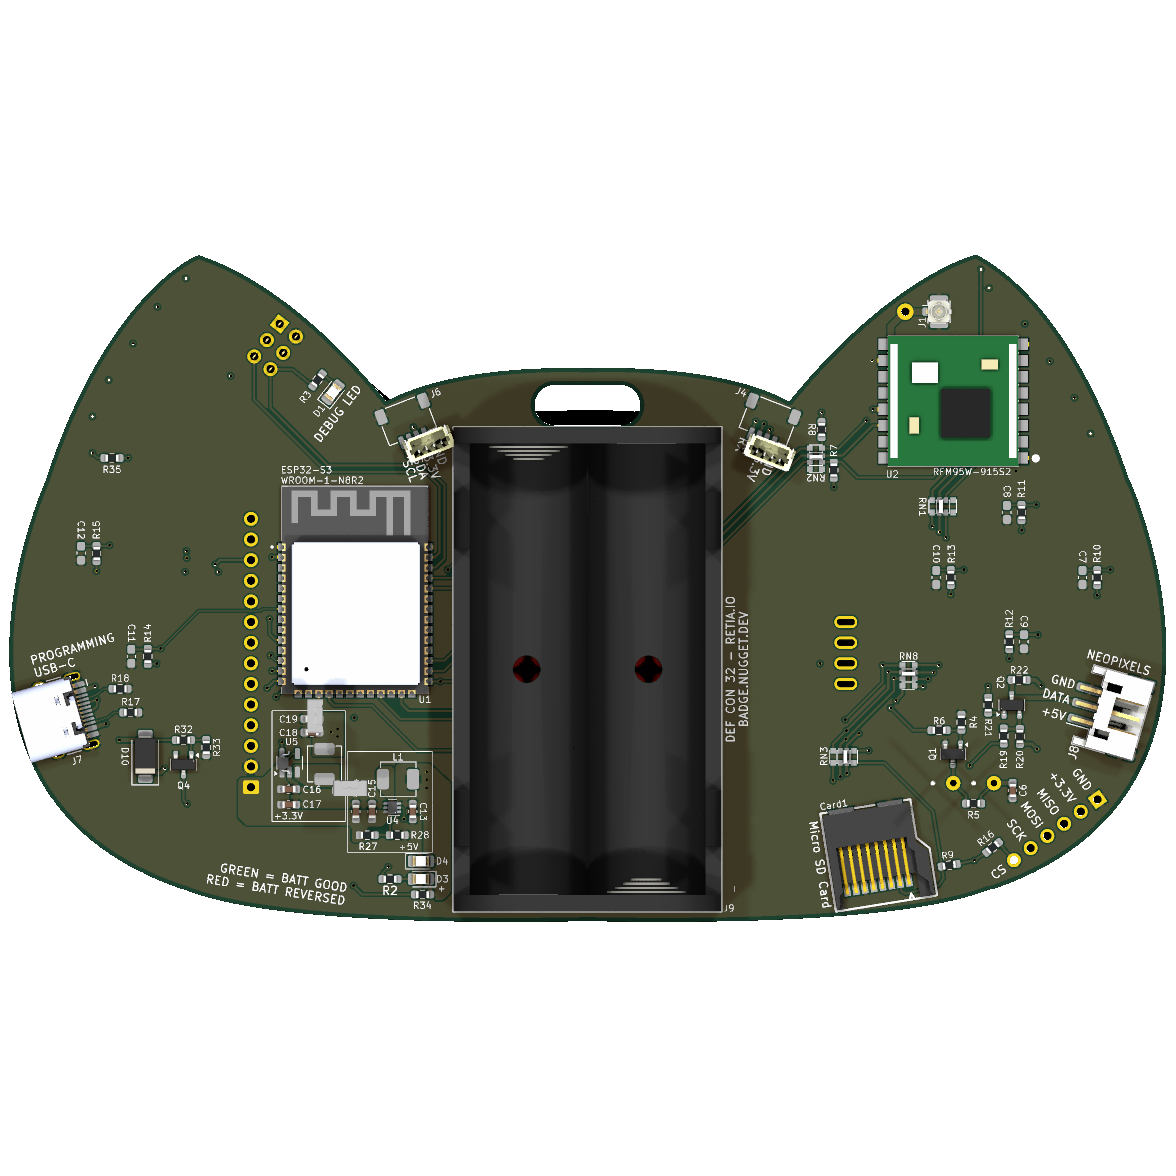
Badge top — KiCad render Badge bottom — KiCad render On-screen content
$ spin, flip, and poke him to see more — or download the 3D model and make a case!
[01] // getting_started

Send off-grid, encrypted messages to your friends in 5 steps

Your cyber cat is ready to yowl on the mesh! Here's how to get your radio meowing.

  1. 01 Power up.
    2×AA batteries (switch on the back) or USB-C — auto-switching, USB wins when both are present.
  2. 02 Antenna first.
    Your antenna should be pre-installed, but make sure it's there before transmitting. RX is safe; TX into nothing can cook the radio's PA.
  3. 03 Plug into USB-C.
    The S3's native USB shows up as a serial port — no drivers. macOS: /dev/cu.usbmodem*, Linux: /dev/ttyACM0, Windows: COMx.
  4. 04 Flash your firmware.
    Flash any standalone image from here or scriptkitty.sh — or try the Badge Launcher to run multiple at once if you have an SD card.
  5. 05 Send encrypted messages to friends off-grid.
    Set your region and start transmitting in your mesh networking app of choice!
!! badge quirks that can bite you
  1. Crossed touch lines. The touch controller and display-module SD slot have swapped MISO/MOSI — hardware SPI can't reach them. Use the dedicated SD slot (CS 10); firmware here already works around touch.
  2. The QWIIC connector is mounted backwards. Check the pinout and hand-wire QWIIC sensors instead of trusting the plug.
[02] // choose_your_mesh

Choose how you communicate

The badge is your beginner guide to LoRa — a radio that talks over very long distances: a lower data rate than Wi-Fi, but much longer range. Meshtastic, MeshCore, and Reticulum are three decentralized, encrypted takes on off-grid communication built on it — no towers, no accounts, no middlemen. The badge runs all three, so you can explore each and decide for yourself.

Meshtastic
beginner friendly
Best for small groups of friends, ad-hoc networks, and mobile nodes — road trips to remote areas, events, anywhere without cell service. Pair it with the phone app and you're meshing in minutes.
!! watch out for
Every device transmits and repeats everyone else, so channels congest easily — and hop limits make it a poor fit for permanent infrastructure.
MeshCore
beginner friendly
Runs on the same hardware as Meshtastic, but only designated nodes repeat — so it scales. Good for permanent infrastructure, with support for 50+ hops across a network.
!! watch out for
Not every node repeats, so coverage needs dedicated repeaters. A newer project — with some drama in the developer community.
Reticulum
power user
A full network stack that's agnostic to the radio — LoRa, Wi-Fi, and more. Run the badge as a standalone messenger with rsDeck, or as an RNode plugged into a Reticulum host. Goes far beyond texting: voice chat, photos, even hosting basic sites.
!! watch out for
Not beginner friendly — more moving parts to set up and a host to run. The versatility is the reward.
// all three flash from this page — pick one below ↓
[03] // flash_the_badge

Train your cat — flash projects here

Flashing happens in your browser over Web Serial — every image is a complete .factory.bin written at offset 0x0. Close any open serial monitors first (one client per port), plug the badge in, and let 'er rip.

loading catalog…
stuck? manual download mode: hold BOOT, tap RESET, release BOOT → retry.
badge "waiting for download" after? tap RESET once — this flasher exits via hard-reset.
flash_log
// flasher idle — pick a build, plug the badge in, hit CONNECT
// tip: close other serial monitors first. one client per port.
[04] // serial_monitor

How to talk to your cat

Firmware in the repo uses the 115200 baud rate. Click connect, select your board, and you're ready!

// serial monitor idle — plug a badge in and hit CONNECT
>
// meshtastic note
USB carries the protobuf client API, not a text log — use the phone app or meshtastic --port PORT --info. Human-readable logs live on the UART header (J4).
// rnode status
A flashed RNode answers rnodeconf --info PORT. The TFT build shows frequency, airtime and channel load live on the badge screen.
// coming soon
Browser visualizers fed by badge serial: mesh traffic maps, packet entropy art, spectrum plots. The paws that refreshes.
[05] // firmware_catalog

More than nine lives

Every image is hardware-verified — hit flash to load it into the flasher above.

Roll your own: both examples/ are PlatformIO projects with the badge board definition included — hello-badge is buttons + LED + buzzer in 100 lines. Copy one as a template.
[06] // hardware_and_pinout

Tech specs

MCUESP32-S3-WROOM-1 — dual-core 240 MHz · WiFi + BLE · 8 MB flash · 2 MB PSRAM · native USB-C
DISPLAY2.4″ color TFT + touch — ILI9341 240×320 · XPT2046 resistive · 40 MHz SPI
RADIORFM95W LoRa 915 MHz — SX1276 · U.FL antenna · SX127x drivers only
INPUT7 buttons + touch — d-pad + A/B, BOOT as a 7th · all active-low
BLINKIES10× WS2812B NeoPixels (two ears of 5) + green debug LED
SOUNDPiezo buzzer — MOSFET-driven, loudest ≈4 kHz
STORAGEmicro-SD slot — FAT, tested to 16 GB SDHC
EXPANSIONSAO v2 · QWIIC · UART · SPI · off-board NeoPixel out
POWER2×AA (boost) or USB-C — auto-switching, no battery voltage sense
$ the actual 3D model — orbit, zoom, flip. files below ↓
$ cat pinout.map — the ones you'll reach for
buttons   LEFT 3 · UP 4 · DOWN 5 · RIGHT 6 · B 7 · A 8
          BOOT 0 (usable after boot) — all active-low
led       green debug LED ── GPIO 2
neopixel  on-board ×10 ──── GPIO 17   off-board ─ GPIO 0
buzzer    piezo ─────────── GPIO 9
spi bus   SCK 13 · MOSI 11 · MISO 12  (shared ×5!)
chip sel  TFT 47 · LoRa 48 · SD 10 · touch 14 · aux 37
i2c       SDA 35 · SCL 36  (SAO + QWIIC)
lora      DIO0/IRQ 21 · RESET 38  (SX127x only)
uart      TX 43 · RX 44  (J4 header)
!! rule of the shared bus
One SPI bus serves five peripherals. Park every other chip-select high before touching any device — a floating LoRa CS corrupts everything.
Full GPIO map + all 8 hardware quirks:
docs/pinout.md
docs/hardware.md
→ KiCad 8 sources in hardware/

Build a case

The full case-design kit, straight from the KiCad sources. The board is 142.4 × 81.0 mm with a 25.5 mm total assembly height (display glass to battery holder). Give your cat a house.

full_assembly.step Board + every component as CAD B-rep — the primary reference for Fusion 360, FreeCAD, or SolidWorks [download]
board_only.step Bare board solid (outline + holes) — for boolean cavity work [download]
full_assembly.stl Same assembly as a mesh (mm, Z-up) — OpenSCAD and slicer sanity checks [download]
full_assembly.glb The model in the hero above — quick viewing in Blender, three.js, or macOS Quick Look [download]
badge-outline.svg / .dxf Edge.Cuts outline (mm) — laser cutters, Inkscape, or 2D sketch import into any CAD package [svg][dxf]
// scripting a case? also: holes.csv · component_positions.csv · component bboxes · the kit README (coordinate frames, cutout positions, gotchas)